Workouts Library
Premium training sessions guided by elite coaches for maximum physical conditioning
Unilateral Full Body Strength Fitness Health Track
Overview This workout will target all of your major muscle groups and, by focusing on one side of the body at a time, you’ll engage your core and stabilize muscles, helping to improve strength symmetry and coordination!
Quick and Effective Lower Body Strength Fitness Health Track
Overview Challenge yourself today with a quick and effective leg and booty burner! This structure is designed to keep you moving and target your legs from all angles, with short rests between rounds to keep up the intensity.
Quick Core Strength Circuits Fitness Health Track
This short, core-focused workout is a great add-on to your lower-, upper-, or total-body routine — but also a fantastic choice as a standalone workout for your primary movement of the day. Use the single-round warm-up to physically prime your core muscles for the challenging but adaptable circuits that follow, but also focus on slowly flowing through each exercise to activate the mind-muscle connection for efficient muscle recruitment. Each circuit contains exercises that combine isometric holds, dynamic but controlled movement patterns, and a focus on foundational stabilization. These exercises will not only strengthen the core (which includes the abdominals, glutes, hip flexors, and lower back muscles) with traditional flexion/crunching moves, but also improve total body muscle engagement and movement integration (flow). Note that there are only a couple of plank-related exercises in this workout; therefore, if you have wrist pain concerns during plank/prone position exercises, this routine could be a great option to retain in your lineup for future go-to core routines. An important consideration for everyone is maintaining a slight pelvic tuck during both supine (face up) and prone (face down/plank) position exercises. For example, during the dead bug segment of the activation sequence as well as the forearm plank exercise in circuit #1, imagine that you are introducing your hip bones to your ribs — ever so slightly tilt the top of your pelvic bones up and back toward the bottom of your ribcage. Below are a few additional tips to make this routine a fulfilling experience for you: • Modifications for all exercises include decreasing the range of motion and/or bending your knees (shortening the lever) for any moves involving leg extension variations. • Take note of which exercises are most challenging for you and identify differences in ranges of motion, strength, and reps counts for exercises with a unilateral focus (such as the oblique v-ups). Paying attention to even the most subtle of differences will help direct your focus during future attempts at this workout. • Feel free to repeat the short cool-down circuit for an extended stretch or add your own stretches to help you return to a relaxed but energized state. You should feel as if your muscles were “worked” during this routine but still finish with a “ready to tackle whatever’s next” mindset. Enjoy! Workout Activation/Warm-Up: 30 sec on / 10 sec off / 1 round (2:30) -Bear Crawl 3-Second Holds -Dead Bug – R (right arm, left leg) -Dead Bug – L (left arm, right leg) -Rollup Core Circuit #1: 30 sec on / 10 sec off / 3 rounds (6:00) -Scissor Kicks w/ Leg Lowers (torso lifted) -Oblique Swivel Heel Taps -Forearm Plank ***Water Break #1*** Core Circuit #2: 30 sec on / 10 sec off / 3 rounds (6:00) -Oblique V-Ups – R -Oblique V-Ups – L -Full Plank: Alt. Forward Raise (3-sec hold) ***Water Break #2*** Cool-Down: approx. 30 sec per stretch (approx. 1:30) -Child’s Pose -Cat/Cow -Cobra Pose
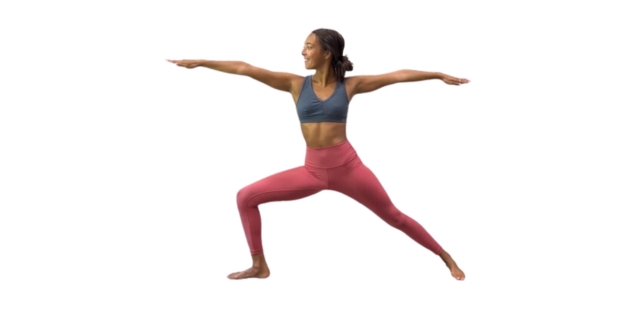
Quick Total Body Power Yoga Fitness Health Track
Build a little heat and release muscle tension in this total body power flow! This practice is best suited for those who consider themselves beginner-level practitioners. While this flow moves slowly and is friendly for those who are just beginning their yoga journeys, I do not recommend this class for those that are completely unfamiliar with the yoga poses. I do not break down the technique for each posture, as this practice is intended to be friendly to most students. To begin, we will move through a series of postures intended to warm up the spine, engage the core, and integrate the breath with our movements. It’s important to take this time to inhale and exhale fully and deeply through the nose, and in alignment with our movements, so that we can begin to build some internal heat and increase awareness of the body. Additionally, the integration portion of our warm-up is a great opportunity to build some fluidity in the joints, and to begin to open and release muscle tension. From integration, we will move into warming, where we will continue to build that internal fire and increase the heart rate. I like to think of Sun A’s as the yoga version of a burpee: you can take these as slow or as quickly as you’d like, you can add transitional movements to advance your practice, or you can take modifications of the postures that aren’t serving you. Sun A’s are a great way to customize your practice to fit your needs; they are also a great foundational flow, so if you choose to follow along with me, the movements will be simple (easy to follow) and they can still pack the heat. Vinyasas are in the same boat as Sun A’s: completely customizable to fit your needs. With that being said, however, while it is completely up to you on whether you want to take the vinyasas or skip them altogether, I would encourage you to try them out because they are a great way to continue building that internal heat. Vinyasas are simple movements that you can choose to make more complex depending on your skill level. The foundational vinyasa that we will move through in this practice will definitely elevate your heart rate, help you to work up a sweat, and build tons of strength in your core and upper-body — even if you choose to modify and take the Vinyasa from your knees. From our Sun A’s, we will move into exploration, elevating the heart rate even higher. Similar to Sun A’s, Sun B’s are like 3-part yoga burpees. They typically consist of Chair Pose and Warrior 1, separating each posture with a vinyasa in between. Sun B’s, again like Sun A’s, are completely customizable, so if you would like to add anything to this portion of your practice, please feel free to make it your own. Though we are only moving through 1 full round of a Sun B (there are typically at least 3 rounds in a power class), we will take about 3 breaths in chair pose and each side of Warrior 1, exploring the fire the will build in our quads and glutes. These poses sneakily challenge our core as well, so even when you’re tempted to maybe not take your fullest expression of a lunge or squat, I challenge you to play your edge and breathe through the discomfort. Reaching the peak of our practice, we will move into some hip-opening with our Warrior 2-focused sequence. The peak of our practice will not only challenge our lower-body strength, it will challenge our hamstring flexibility and hip and spinal mobility as well. Beginning to bring the heart rate back down and re-center our breathing, we will finish off the standing portion of our practice with some balance work. These postures will challenge the strength of your ankle stabilizing muscles as well as your core, and you will find that the poses are a test of your total-body flexibility and mobility. After a final vinyasa, we will have reached the seated/reclined portion of our practice. This section is intended to help lower the heart rate back to normal (or close to normal), and help you find release in all of the muscles that we just worked. The postures will focus primarily on increasing flexibility and some mobility. If there are any final poses or movements that are calling to you that I did not suggest, please feel free to continue your practice and take what feels good. We will complete our practice by getting our feet over our head in an inversion of your choice (Happy Baby is the one I offer in this practice) and take our Savasana. Stay in Savasana for as long as you’d like; you do not have to close your practice when the video ends. I hope that you enjoy this practice, and that it leaves you feeling strong and released! Let me know in the comments below which moments peaked your creativity and curiosity about where you can take your practice next! Workout Notes • For the Vinyasas, I encourage you to make these your own! You can modify them by taking the chaturangas (essentially half a push-up moving from high to low plank) from your knees; you can shift back to child’s pose; you can skip your vinyasa altogether and meet us in Downward Dog. To make these more advanced, you can take several chaturangas and/or take them with one leg lifted. If inversions are in your practice, you can play with moving from a handstand or crow to a chaturanga. This is your practice — take or skip what will best serve your body! • This practice moves relatively slow and explores more foundational postures. Sometimes those factors combined can make it easy to tune out — especially if you’re an advanced practitioner. However, I invite you to focus on the breath, and breathe fully with every movement. Allow the heat to build with your ujjayi breath and turn your awareness to your body. Notice how the same postures might feel completely different on each side. Notice where you’re unnecessarily holding onto tension or sinking into your joints without the support of your muscles; make adjustments or modifications where/when it feels necessary. Take your own creative spin on this practice and see where your body guides you. Wherever you set your focus, whatever postures you choose to take/don’t take, I invite you to dive fully and deeply into the present moment! • During Warrior 1 for our Sun B’s, if the posture feels inaccessible for your hips, you can modify by taking High Crescent Lunge instead. • Please note that in all lunge postures, you can modify by dropping the back knee to the mat. If you are looking to lower the heart rate slightly, but wanting to stay in the lunge, you can always bring your hands to heart-center, rather than keeping them raised overhead. • Savasana is corpse pose: a pose at the end of yoga practices meant for rest and stillness, ease after the effort. Typically, savasanas are taken on the back, with your arms and legs fully extended and relaxed. However, I like to invite practitioners to take any posture that feels best in their bodies. You, of course, can take the traditional corpse pose. Or, to help your mind stay present, you bring one hand to the belly and the other to the chest to tune into the rise and fall of your breath. You can take the poses I suggested below (suggested for those looking for lower-back support) or take your own. This is your practice, and I encourage you to explore anything that spikes your curiosity. Equipment • Yoga mat • Yoga blocks [optional] Flow Structure Integration • Child’s Pose • Swan Pose • Cat/Cows • Thread-The-Needle • Beast Plank Static Hold • High Plank • Low Plank • Upward Dog • Downward Dog Warming • Sun A’s [x2] • Vinyasa [x2] ~ You can modify these by taking them from your knees; taking a child’s pose; or skipping them altogether and meeting us in Downward Dog. Exploration • Sun B’s [x 1] • Vinyasa [x3] Peak • High Crescent Lunge • Warrior 2 • Reverse Warrior • Extended Side Angle • Triangle Pose • Reverse Triangle • Vinyasa Recenter • Padangusthasana • Dancer Pose • Figure 4 • Final Vinyasa Release • Half Pigeon • Wild Thing • Seated Forward Fold • Bridge Pose • Gentle Spinal Twist • Happy Baby Rest • Your Savasana [Suggested Posture: Reclined Butterfly or Knees Bent w/ a slight internal hip rotation]

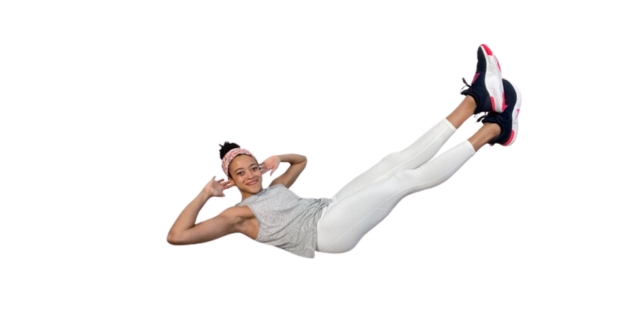
At Home Abs Workout Fun Core Exercises for Toning and Functional Strength Fitness Health Track
With this core workout, I wanted to utilize standing abs exercises and functional ranges of motion beyond the basic crunch. The wide variety of movement in this workout provides a challenge throughout the whole core: abs, obliques, and lower back. Instead of doing hundreds of variations of crunches, we’ll spend the majority of the routine up off of the floor, with standing abs exercises. These use a combination of strong movements and balance, which calls upon the core muscles in a unique and highly functional way. If you move lightly, these intervals can feel like light cardio, or a nice-feeling active/dynamic stretch. Or, you can focus on moving strong, contracting your muscles, or even actively working against yourself in order to step up the challenge. In the last third of the routine, we drop to the floor for some mat core exercises. These also target the muscles of the front of the core, the sides, and the back. Even while we’re on the floor, we’re calling on balance challenges (e.g., the single arm reverse leg lift). Make sure to minimize the momentum that you allow into each movement, instead using your muscles actively, and moving with intention. If you want to step up the challenge of this workout, hold onto a dumbbell or kettlebell where applicable. You can also choose the more advanced modifications for any given interval – for instance, doing a side plank “dip” from a full side plank, instead of a half, or lowering your legs closer to the ground during the scissorkicks. When it comes to the difficulty of a routine, it is 100% your responsibility as the exerciser, especially when working out by yourself at home, to select your challenge level. If something feels too easy, check your form, then deepen your range of motion, or add more resistance in the form of weights. On the other hand, if something feels too difficult for your needs today, be sure to modify to make it work for you (e.g., shorten your active intervals, lengthen your rest intervals, take more breaks, etc). Speeding up or slowing down an exercise can make it more difficult or easy, depending on which exact exercise you’re talking about. Long story short, do anything you need to to make this routine work for your needs today. You will need: a mat if you don’t have a soft surface on the floor, and an optional dumbbell or kettlebell to step up the challenge. Workout Structure: 45 Seconds Active, 15 Seconds Rest Low Impact Star Jumps Captain Morgan Claps Narrow Squat + Row Woodchopper + Knee Pull Other Side 5 Torso Twists + Punch Sumo Squat Leans Side Plank Dip + Knee Other Side Scissor Kicks Single Arm Reverse Leg Lift Other Side Straight Leg Crunch + Leg Drop How to use this abs workout? You can do this workout as a standalone routine (just be sure to add a quick warm up and cool down), or you can use this as a burnout round on the end of a strength or HIIT workout. How often should you train abs? If your midsection is sore after a workout, give those core muscles a rest. Just like any other muscle group in the body, your abs need a chance to heal and repair after strenuous workouts. When your soreness is gone or nearly gone, you can do core intensive workouts again. I hope you enjoyed this workout! Did you listen to music while you worked out today? Tell me what you listened to!
Lower Body Active Stretch Routine PNF Stretch Routine for the Lower Body Fitness Health Track
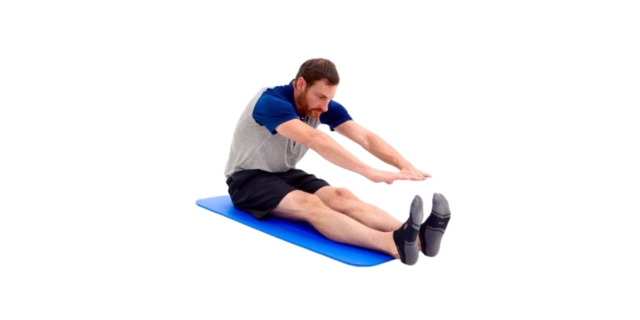
Sometimes you just want to take a little extra time to get in a really good stretch and if that is how you feel today then this lower body stretch is for you. This 20 minute routine was built specifically for the purpose of getting a longer more thorough stretch, and is designed to specifically target the lower body. There are many different types and styles of stretching from more ballistic style warm up stretches, static hold cool down stretches, pin and stretch movements and even myofascial release techniques. Each has its benefits and drawbacks so just picking one style can leave gaps in your fitness regimen especially if the only stretches you do are in your warmup and cool downs. In this video we will be doing something I call “Active Stretching”. This is a form of PNF stretching (which stands for proprioceptive neuromuscular facilitation) in which you contract the opposing muscles of the muscle or tendons you are trying to stretch. This type of stretching uses your body’s own neurological reflexes to facilitate a deeper stretch. I won’t go into too much detail here on why this works the way it does but simply put when you contract a muscle it’s opposite will relax. This is similar to Contract-Relax stretching which uses the same body response but instead of relaxing you try to hold your contraction while lengthening the antagonistic muscle. In my opinion this results in a stretch routine that builds tone and control in your maximum range of motion (ROM) and theoretically protects the joint better as it approaches its max ROM in everyday life and exercise situations. We have 32 individual stretches to go through and we will be holding each position for a total of 30 seconds with a 10 second prep to get ready for each stretch. Once the time starts for each stretch we will focus on contracting the opposite muscle from the one we are trying to stretch. We will start out with a light contraction and increase the intensity of the contraction as the time elapses looking to hit a 75-90% contraction by the end of the 30 seconds. The level of contraction will be up to you and how you feel in each position, however, be sure to try your best to match the intensity of the contraction/stretch on each side of the body as we will be isolating left and right sides often. You can also do an easier version of this routine if you want more of a relaxing stretch routine. Simply cut out the antagonistic contraction and use gravity, leverage or even your arms to pull you into each position. This will ultimately turn this routine into a static stretch routine which is also a great way to do a more relaxed corrective stretch. Let us know what you thought of this routine and if you would like to see more routines like this one in the future in the comment section below. Enjoy. Workout Structure – 32 Individual Stretches – 30 Seconds Each – 10 Seconds Rest / Prep Equipment: – Exercise Mat (Optional) Warm Up / Cool Down: – Not Needed Workout: (30 On; 10 Off) – Toe Touch Flat Back – Toe Touch (Regular/flat) – Toe Touch (Pronate/inside) – Toe Touch (Supinate/outside) – Inside Thigh (L) – Inside Thigh (R) – Wide Stance Toe Touch – Quad Stretch (L) – Quad Stretch (R) – Calf Stretch (L) – Calf Stretch (R) – Deep Lunge Stretch (L) knee past chest – Deep Lunge Stretch (R) – IT Band Stretch (L) side cobra – IT Band Stretch (R) – Seated Single Leg Toe Touch w/ Side Bend (L) (chest down) – Seated Single Leg Toe Touch w/ Side Bend (L) (chest open) – Pigeon Pose (L) – Seated Single Leg Toe Touch w/ Side Bend (R) (chest down) – Seated Single Leg Toe Touch w/ Side Bend (R) (chest open) – Pigeon Pose (R) – Seated Torso Twist (L) – Seated Torso Twist (R) – Butterfly Stretch – Hip Socket Stretch – Seated Toe Touch (Toes Out) – Seated Toe Touch (Toes In) – Lying Torso Twist (L) – Lying Torso Twist (R) – Deep Glute Stretch (L) – Deep Glute Stretch (R) – Cobra
Pilates Flow Lower Body Pilates Workout Fitness Health Track
When talking about the benefits of Pilates, the first thing that usually comes to mind is its ability to improve strength in the core (the muscles that form a loop around your waist from the base of your rib cage to the crest of your hip). Though this may be the first thing people think of, it’s just the beginning of the list for what Pilates (and other functional training) can do for your body. One of the most underrated aspects of these types of exercises is the mind-body connection, coordination, and the control it builds. After all, the level of strength you have means nothing in real life situations unless you have control over that strength. By taking your time with each of these movements to keep proper form through each repetition, focusing on getting as full of a range of motion as you can, and focusing on how your body feels while doing these movements, you can effectively improve your ability to know where your body is in space at any given time. Improving your proprioception (sense of self-movement and body position) improves your coordination, overall efficiency, and control in everyday life activities. This can translate to a lessened likelihood of injury, better sports performance, and in some cases, relief from bodily aches and pains. With this specific routine, we are focusing less on the core by itself and instead focusing on how the legs and core interact together. This not only engages the core and the legs, but also the pelvic floor, one of the most important (but rarely focused on) muscle groups. This relatively small group of muscles are a massive part of your body’s ability to move and function normally. When they are injured, over toned, under toned, or have strength imbalances, they can cause all kinds of issues…ranging from hip and knee problems, lower back pain, core instability, and even things like incontinence. In this Pilates workout, we will be performing a range of exercises that require you to not only be able to control your legs and how they are moving, but also require you to control your pelvic floor, core, diaphragm, intercostal muscles, and many more supporting muscle groups. So, go into this with the mindset that we are building foundational control and strength that will improve your ability to effectively do a multitude of other activities—from more challenging workouts, to everyday life activities. We start into this workout with just a quick check for the way that we’re feeling and breathing, making sure to notice and release any lingering tension in muscles that we shouldn’t be firing at the moment (e.g. frowns, clenched jaws, a tight pelvic floor). Enjoy a few deep belly breaths, using the breath to fill out your torso, your lower stomach, back, and pelvic floor. Slowing down to focus on our breath – even for just a minute – can help coax our bodies into a parasympathetic state (rest, digest, and heal), helping bring more ease to both body and mind. You can use breath work like this at any point in the day, to find more calm. Workout Structure • Pilates Flow: 35 Seconds Active, 5 Seconds Transition • No equipment necessary; exercise mat optional, for hard surfaces • Warm up and cool down not included Printable Pilates Butt and Thigh Workout – Deep Belly Breathing – Imprint – Side Leg Lift (L&R) – Up and Back Side Lift – Pulses – Clam Shell – Side Plank – Kneeling Leg Circles Top – Kneeling Leg Circles Bottom – Kneeling Curtsy Lift – Supine Raise (Alternating) – Full Body Stretch This Pilates routine is great as a standalone workout, or you can always add it onto the end or beginning of a strength or HIIT routine. It’s great for burning out muscles after a tough workout, or just waking them up after being otherwise sedentary. I hope that you enjoy the quick invitation to take a second to check in with yourself and your breathing, and I hope that you start to work this small, short mindfulness practice into your day at random times in order to bring yourself a little peace and calm. Thank you for working out with me!
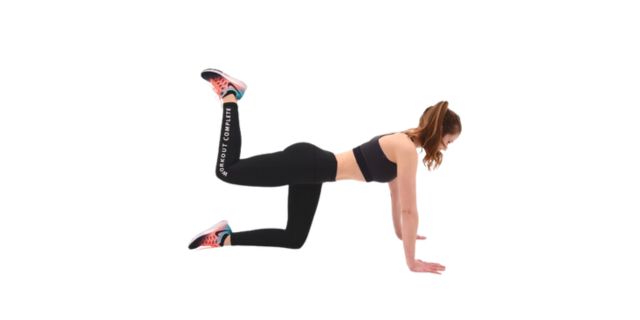
Ascending Rep Pilates Butt and Thigh Workout for Glute Activation Mat Pilates Flow Fitness Health Track
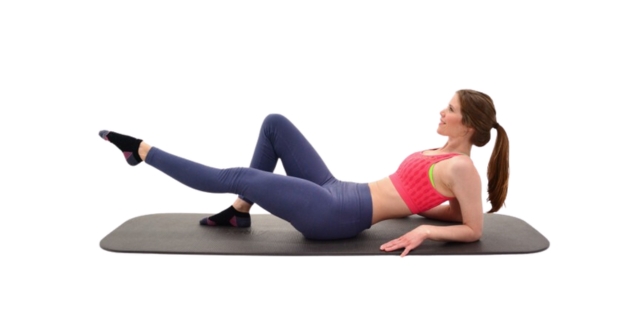
This workout has been one of my go-to favorite routines over the past couple of years, and it always makes me feel great. It’s a low impact workout that ironically packs a real punch when it comes to the glute and thigh muscles. We’ll be doing ascending repetitions of Pilates-inspired exercises, but the fun and wildly adaptive part is that each move can easily cross over into the realm of strength training — especially if you add resistance bands, ankle weights, or dumbbells. This can be a beginner workout, but it can also be an advanced workout; the difficulty comes down to your own focus on muscle engagement, whether or not you add extra resistance, and which variation of each exercise you choose to do. As much as we love HIIT and strength training, our bodies sometimes need a rest from heavily strenuous moves, a chance to heal from intense workouts. It’s not that jumping or impact is bad. In fact, strategic physical stress is part of what signals our bones to become stronger and more dense in order to be able to withstand the impact. It’s all in finding a balance, and challenging muscles in a well-rounded variety of ways, so that we don’t overtax our bodily systems or cause strain that we don’t allow ourselves to properly recover from. That’s where diversity in training types becomes a major benefit to a routine. Not only does this butt and thigh workout offer a different way to work the lower body, it also engages the muscles in ways that aren’t always easy to target or isolate with more traditional strength training. In fact, these are often the recommended exercises for glute activation; if you have trouble “feeling it” in the right places during squats, exercises like this may help you better recruit those muscles. You will likely notice this for yourself during exercises like the clamshell or hip abduction, side lying circles, or bridge + butterfly. These exercises are also great for building stability in the hip and knee joint. Remember to stay tuned in and focus on really doing each movement with intent. This workout can feel like a total walk in the park if you just breeze through the motions. It could also be challenging for a very fit person, with the proper focus on muscle engagement, and slow, controlled, deliberate movements. Your focus makes all the difference in the world! The pace is relatively quick moving, so it might pay off to take a second to become familiar with the layout of the workout before jumping in. The idea is to flow from one round to the next, gradually warming up your muscles with the exact exercises you’ll eventually be doing in higher repetition. We start off with 5 reps each, then repeat another round with 8 repetitions, then we hit the same muscles again with 12 repetitions, before going directly into a cool down and stretch. By the time you reach the last round, your lower body muscles really should be talking to you. Workout Structure Pilates Flow with ascending reps; 5, 8 and then 12 reps through for each exercise No equipment (add resistance band, ankle weights, or dumbbells to increase difficulty) Warm Up and Cool Down included Printable Pilates Workout Laying on right side of body: – Side Leg Lift + Reach – Side Leg Lift Back – Clam Shell – Side Lying Circles (Forward / Back) Laying on Left side of body: – Side Leg Lift + Reach – Side Leg Lift Back – Clam Shell – Side Lying Circles (Forward / Back) On Back: – Bridge – Bridge + Butterfly – Reclined Leg Raise (Left) – Reclined Leg Raise (Right) On Stomach: – Prone Leg Raise (Right) – Prone Leg Raise (Left) – Kneeling Leg Raise (Right) – Kneeling Leg Raise (Left) Cool Down: Cat to Cow Side to Side Deep Glute L Deep Glute R Single Leg Hug Side Twist Pigeon Runner Calf Stretch Cobra Child’s Pose Shell stretch This routine has been a lifesaver for me, and I love it! Let me know how you used it. Did you add extra resistance for more challenge? Did you like the flow style of this routine? What exercise did you find the most difficult? Were you sore the next day? As always, thank you for working out with me!
Fat-Burning Cardio Workout with Relaxing Cool Down & Low Impact Cardio Modifications Fitness Health Track
You won’t need any equipment at all for this bodyweight-only, fat-burning cardio workout. I’ve included your warm up cardio and cool down, so that you can get in a well-rounded, smart workout in right around 35 minutes. This is a fun mid-range cardio workout that can easily be modified to be much more difficult, or much more beginner friendly. As usual, I encourage you to move at your own pace. Just watch to see how the exercise is done – make sure you have the correct form or pattern down – and then implement at your own pace. Add weights for an extra challenge, or deepen the ranges of motion in order to increase the difficulty. Or, move more slowly, and use a shallower range of motion. Adjust the rest and active periods as you need to to meet your own fitness and endurance level. As long as you’re staying present, mindful of form, and doing the very best that you can at the moment – pushing yourself and your comfort zone just a bit – I’m happy and you should be too. Many of these cardio exercises are highly dynamic, calling upon coordination, balance, and bodily control. So be warned; some of these may feel slightly awkward or like they have a tiny bit of a learning curve. Don’t be discouraged – this added challenge is part of the benefit and point of the workout. Aside from building coordination, another reason that I like to work in multi-jointed combo moves is to break up long duration strain on any one muscle group, making it a more beginner, intermediate, or recovery day workout friendly. On the other hand, if coordination and bodily control is something that you struggle with, you might find this workout video challenging on a whole different level – and that’s great. As you can see in the video, I move back and forth between the high and low impact options. If you’re just getting started into a fitness routine, pushing your comfort zone like this – just a little at a time – can be a great way to safely and steadily keep making forward progress in your endurance and strength. I’m not at all ashamed to admit that I was so sore after this workout. This is by far the most intense workout I have done in 16 months. So it was a bit exciting for me. Plus, I really enjoyed the workout! I hope you enjoy it as well. Work hard, have fun, and keep your self talk positive! Workout Structure After a quick cardio warm up, we move on to intervals of 45/15, in an AB/AB format. You won’t need any equipment, though dumbbells or resistance bands can easily make this a pretty brutal workout. An exercise mat can be helpful if you aren’t on a soft surface. There is a long, relaxing cool down and stretch at the end of this workout. Turn on some music that motivates you, put on some comfortable workout clothes, grab a water bottle, and let’s get to work! Printable No Equipment Cardio Workout 5 Minute Warm Up – 30 Seconds Each Interval March in Place or Boxer Shuffle Step Through + Lateral Step 2 Torso Twists + Knee IT Band Stretch Steps 2 Butt Kickers + Front Kick Good Morning + Reverse Fly Fly Jack Steps Plank Steps Bird Dog Bridge Total Body Cardio Workout – 45 Seconds Active, 15 Seconds Active Rest 2 Runners + Wide Squat (+ 2 runners on other side – Tip: start runner reps on inside leg) 2 Jumping Jacks + 3 No-Jump Jacks Step Combo: Front Step, Back Step, Side Lunge, Curtsy Side Leg Raise Jacks + High Knee + Ventral Raise in Center Water Break Crab + Extension & Kick Step Throughs + Arms Static Squat + 5 Punches + Reach Lateral Jumps + Knee Pilates Rear Leg Lift Leg Raise + Reach Cool Down & Stretch
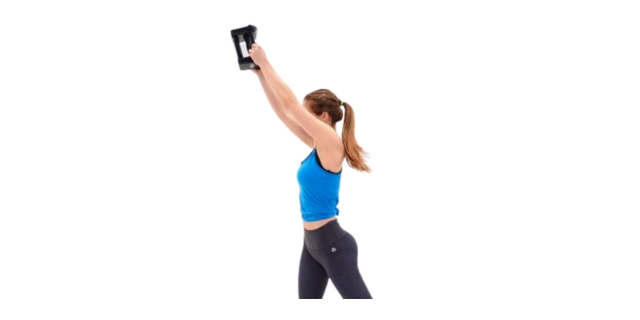
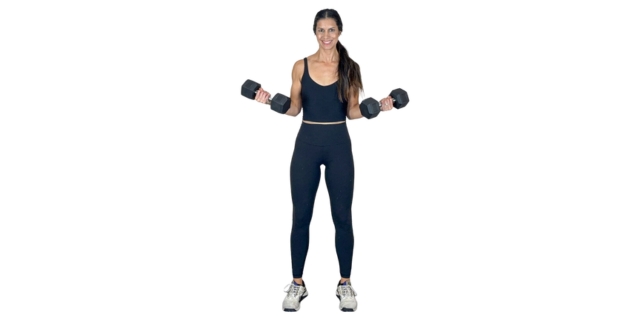
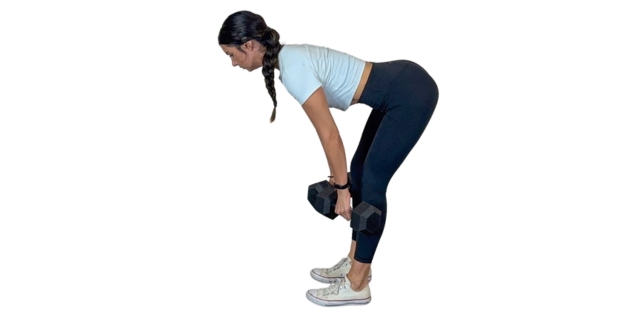
Fun Upper Body Workout + A Message About Goal Setting Fitness Health Track
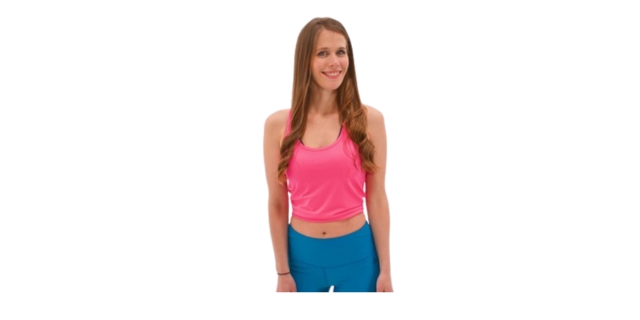
I know that our audience is typically split on this subject, but I personally really like the ten minute workouts. They can be mixed and matched to create hundreds of options that you can build into your own custom routine. Put 2-3 of the videos of your choice together, add a warm up and cool down and you’ve just built your own smart 30-40 minute workout plan. Or, on the other hand – you could just do those 10 minutes as your whole workout that day (still adding on both warm up and cool down). Ten minutes is so much better than zero minutes when it comes to smart, targeted, focused training. I think it also helps break up with the “all or nothing” mentally which can be so damaging to the goal of becoming healthy – or making progress towards any goal for that matter. Sometimes it really comes down to those little things that you do, nearly every day. No grand gesture or extreme, awe-inspiring lift. Just another inch towards where you want to be, day in and day out. Showing up for yourself in small ways, over and over again. One good way to think of it, especially if recently you feel as though you’ve fallen out of the habit of working out, is to consider how much different you might feel right now if you had been doing just 10 minutes, 5 days a week, for the last 3 months. Would that be more or less than the goal that you have set for yourself recently? And, next question; have you been hitting that goal recently, or would the seemingly meager amount of 10 minutes a day, most days of the week, be more time than you have literally put directly towards that goal? I think small goals are a great option if you’re struggling with motivation. It may sound weird but maybe try setting the bar low – you’re more likely to hit that goal, and that feeling is more likely to propel you forward. When you have moved around for 10 minutes, you’re going to have changed your physiology and mental state, and you’re going to be more likely to want to keep moving, maybe even finishing a good 30-40 minute workout. Related: How to get started and make a fitness habit stick + 10 of our favorite beginner workouts Consider the same analogy for learning a language. Think of how quickly you might be able to hold simple conversations in another language, if you put 10 minutes a day to studying and exploring that language. You can see how it would eventually add up beautifully, and all without the individual feeling hard pressed or like they were following a rigorous, tiresome routine that they may ultimately grow to find tiresome and too hard to stick to, maybe abandoning the goal all-together; sounds a lot like New Years Resolutions, or the diet cycle in general, right? Make a lofty goal. Push and punish oneself towards that goal. Tire of it’s demands, it’s restrictions and it’s demanding nature, and then decide to let it go all together. Long story short; small goals can pay off in the end, and it might be a refreshing strategy if you find yourself in a lofty goal – crash and burn cycle. Anyways, now that I’ve given you a lecture on motivation and goal setting that you really didn’t ask for, let’s get to the lifting! Workout Structure A combination of traditional upper body strength exercises with a slight twist on each. Some will place demand on balance and bodily control, and others will pull in full body movement to challenge coordination. A person can easily make this workout more purely-strength focused (if desired) by cutting out the balance challenging modifications for a fully grounded stance more suitable for heavy lifting. There is no warm up or cool down; both are recommended. Printable Upper Body Workout: 45 Seconds Active, 15 Seconds Active Rest Curl + Captain Morgan Dumbbell Drop + Step Tricep Extension + Halo Lateral Raises Ventral Raises Bentover Fly Press + Captain Morgan Wood Choppers Arm Circles Press + Extension 20 Question time: Which was your favorite strength interval? Were your upper body muscles starting to talk to you by the time the ten minutes was up? And, if we disagreed before, does the note above change your mind at all towards goal setting styles and the benefit of 10 minute workouts in your routine? Did you like the blog/article/subject-tackling theme of this workout write up? Let me know if you’d like to see more like it. Talk to me; I’m always open to your feedback & I’d love to hear your thoughts 🙂 Thanks for working out with me!
35 Minute Pilates Workout for Butt and Thighs At Home Pilates Workout Fitness Health Track
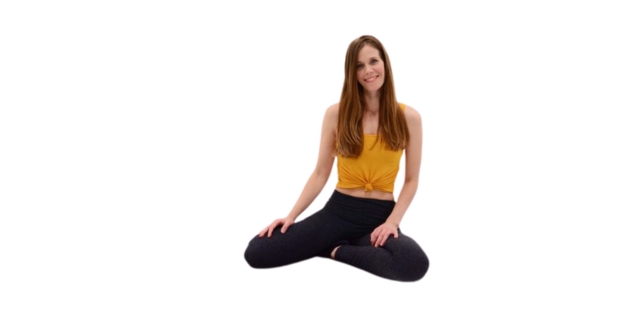
This Pilates workout for the butt and thighs requires no equipment at all, meaning you can do it anywhere. This is an intentionally slow routine. Pilates is normally slow, but here I’ve slowed it down even more, with a short pronounced pause at strategic portions of each range of motion (ROM). It might feel counterintuitive to move so slowly, but pay attention to the way your muscles feel when you slow the motion down; you will feel it! When you move this slowly, you make it nearly impossible to use momentum to “cheat” through portions of your range of motion that are weaker. It’s a great way to make sure that you’re strong all the way through a particular ROM and it helps increase overall bodily control. It’s not as exciting as a sweaty, breathless HIIT or strength routine, but it is important and helpful to being able to safely doing those other, more intense styles of training. On a personal note, these exercises have been a lifesaver for me recently. If you’ve ever worked out with us over the last 9 years, you’re probably used to seeing me push myself through challenging HIIT & strength workouts. Right now, I’m a beginner all over again – and that’s fine. A couple years ago, I started struggling with chronic pain. Around 4 months into the ordeal, it got much worse. I spent 2 years nearly entirely homebound. There were points where I could barely walk. It was terrifying, very painful, and I became depressed. There were moments where I honestly thought my life was over. It took a lot of personal work but I tried hard to look at it as an “eye opening” experience instead of a devastating one, and I have done my best to take the experience and turn it into something positive, something that I can hopefully eventually utilize to help others. It’s working; I have a ways to go, but I am doing much better. So this was my return to filming, the first time I’ve said “Workout Complete” to you guys for over 10 months! It felt good to be back. I’m a little rough but I’ll get back into the swing of things 🙂 I wanted to share a couple of things. Firstly, I have not done any HIIT or strength training for well over a year now (note: my pain is/was not related to either HIIT or strength training). I often see people stressing out about a missed workout, or a missed week of workouts, thinking that they are going to lose all of their progress if they don’t stick to the grind. I just took a year off of any intense workouts whatsoever! I know that my body has changed but I am still at a healthy bodyweight and I am still healthy. If you keep a calm mind (don’t panic), do the physical activity that you are able to at any given point, and make sure that you’re eating healthily, all hell won’t break loose. I share this in hopes to encourage you to keep a less militant attitude about your own workouts. Related: 4 Week FB Low Impact – Fat Loss Program – 40 Minutes or Less Something else I want to share; I know this beginner friendly workout will seem very easy for some of the FB community, and I think it’s important to keep in mind that it might also be very difficult to others – myself included, at the moment. I really dislike seeing people knocking “too easy” workouts; 1) there are people who will struggle with those same routines others scoff at, and that can be a disheartening situation for someone who’s just starting out. 2) these are foundational workouts! I’m sorry to tell you but no one is too cool for these kinds of exercises; the “easier”, slower stuff is all part of a well rounded routine & being able to push yourself safely. And, you may find yourself unexpectedly a beginner again one day so it’s important to be compassionate. Life happens. Related: Dealing with setbacks; How to stay fit while injured or sick I actually had to work really hard to be able to get to a point where I could even do this particular routine, something that would have been very easy for me before. When I first started doing this routine after my setback, I was only able to do 3-4 reps, one time through. I felt so weak. But I kept at it. Just a little at a time. I am on my way to rebuilding, and can now do these exercises for ten reps, twice through. That’s progress! And instead of being ticked because “I’m not where I was”, I’m celebrating my steps forward. I will not talk negatively about my body; these are the times when our bodies most need us to show up mentally and say “I’ve got you. We can do this”. Maybe even drop an L bomb in there; “I love you”. It’s cheesy and it might feel entirely ridiculous and foreign at first but it’s a mentality switch worth making. I’m not quite there yet, but when I can safely take on a more intense workload, I want to share the things that I have learned through this experience, and the things that got me through. Anyways, onto the workout! Workout Structure We start off with a gentle cardio warm up, and then move onto a Pilates workout for the butt and thighs; your cool down and stretch is also included. Modifications will be provided all throughout; choose the difficulty level that works for you. The modifications make this a great workout for a wide range of fitness levels; it’s a beginner friendly workout but you can also add bands to these Pilates exercises in order to significantly increase the challenge. You can also take longer breaks and modify if an exercise makes you feel unsure or uncomfortable. Make it work for you! Cardio Warm Up: 30 Seconds each March in Place Side Step Chest Opener Warrior Steps Single Leg Walker (repeat on both sides) 3 Marches + Knee Pivot Pulls Squat + Side Leg Lift Up & Over Side Lunge Jumping Jacks (low impact modifications provided) Printable Pilates Workout: 10 Repetitions each Side Leg Raise Clamshell/Hip Hinge Side Rear Diagonal Raise Kneeling Leg Raise Fire Hydrant Kneeling Diagonal Extension Bridge Back Bow Bridge + Extension Squats Side Steps Side Lunge Cool Down & Stretch I really did miss talking & working out “with” you guys. I’m wildly grateful for my friends and family, and the FB Community. So many people reached out to share their own stories and methods for dealing with chronic pain. This little corner of the internet is a beautiful place, thanks to you guys. Grateful to be able to say that I’ll see you guys soon with some more new workouts! Thank you for working out with me,
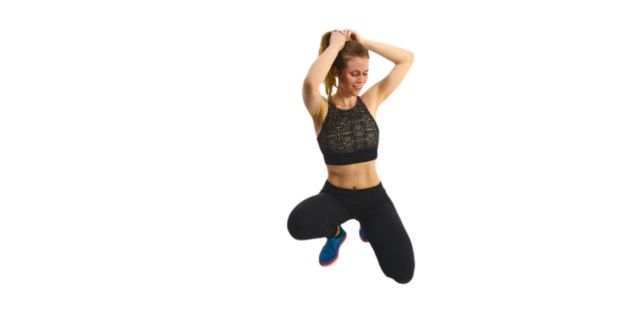
Fat Burning HIIT Cardio Workout Fitness Health Track
High intensity interval training (HIIT) is one of the best ways to get fit quick – not just looking fit, but feeling fit, as well. It’s a great workout for burning fat, boosting endurance, toning up allover and building explosive speed and strength. If you’re looking to get or stay lean, HIIT workouts should show up in your routine between 1-3 times a week, depending on your goals, training intensity and fitness level, or how quickly you recover in between sweat sessions. HIIT cardio is a fat burning powerhouse; the short intervals ask you to push yourself much harder than you would be able to if you were doing longer duration bouts of movement. Because it only lasts 20 seconds each time, you’re basically seeking out discomfort in the form of a pace that is not sustainable for much more than that short interval. Related: We just lanched a brand new workout program that uses a smart combination of HIIT & Strength, check out 4 Week FB Burn! This unsustainable, intense burst of energy output revs up the metabolism because the body does not instantly return to the normal rate of expenditure. Instead, it slowly normalizes itself over the next hours and sometime even days (depending on the intensity of the workout). While it’s returning to normal, you get the benefit of burning calories at a higher rate than normal – even while you’re just sitting around. It’s a great example of working smarter, instead of harder, though no one is about to argue that HIIT is not difficult. My lower body was so thoroughly sore after this workout! Definitely sore in the glutes, inner and outer thighs, quads and hamstrings. It really pushed me and though I struggled my through the workout, I still felt really great by the time it was all over. Related: What you can do NOW to prevent knee problems in the future I’ve tried to make this no equipment workout as accessible as possible by using only bodyweight exercises, meaning that you can take this routine with you anywhere. This is not a beginner workout, but I’ve also included both low impact and advanced versions of each exercise all the way through, just in case you need a break from the more intense intervals or if you have neighbors living below you. Feel free to move back and forth between the different modifications shown as you need to; whatever you do, just make sure that you’re pushing yourself. Workout Structure After a cardio warm up, we jump right into the HIIT workout, which uses intervals of 20 seconds on, 10 seconds active rest, three times through for each set. The exercises target the glutes, thighs, and core, and there is a heavy emphasis on both cardiovascular and muscular endurance. Cool down and stretch is included. Turn on some music that you love and get ready to work hard! Warm Up Cardio: 25 seconds per interval Jog in Place Swing + Step 3 Torso Twists + Knee Standing Pike Warrior Jacks Toe Touch Circles Butt Kickers Squats Long Lunges Other Side Slow Burpee Up & Over Hops Up & Out Jacks Plyo Side Lunges Printable HIIT Workout: 20 Seconds on, 10 seconds rest, x 3 per exercise Jump Squat Front Kick Push Ups Jumping Lunge Skip Jump X Burpee (just 2 rounds since I set my timer wrong; lucky you 🙂 ) Water Break Squat Jacks Heel Click Drop + Step High Knees Burpee + Side Kick Tall Plank Leg Lifts Squat Drop + Ankle Tap (alternating sides) Broad Jump Forwad + 3 Squatted Steps Back 2 Runner Drops Lateral Jump Squat Jack Cool Down and Stretch I really loved this workout; it kicked my butt. The “squat drop ankle tap” move really snuck up on me, as did the broad jumps (they always do). I think I will do this again with you guys once we’ve released it. I would love to know what you thought; were you sore afterwards? Thanks for working out with me!