Workouts Library
Premium training sessions guided by elite coaches for maximum physical conditioning

Core-Focused Vinyasa Yoga Fitness Health Track
There are many ways to strengthen the core besides laying on the mat to knock out 50 crunches; nor does core work have to be a rigid and tedious set of exercises that require hours of your time. Join me on the mat for a total-body workout that emphasizes the use of our core and challenges our strength, stability, and mind-muscle connection. This all-levels Vinyasa Yoga practice not only targets the entire core (yes, there is more to our core than those 6-pack abs), but focuses on strengthening the deep core muscles as well. In 25 minutes we will start with a warm-up that intends to draw your awareness to how you engage your core in various grounding postures. The moderately-paced flow will provide you with insight on how you use your core in a variety of standing/balancing postures. Finally, our brief cool-down will bring you back to the mat as we gently re-center our breath and awareness, in addition to passively stretching out the well-worked muscles. Please note, that while this practice offers a variety of modifications, you are free to choose what movements serve you and which do not; as always, you are your best teacher, so please take what honors your body (all postures/movements can be modified to meet you as you are) and leave what does not. We may often think of the core as just the “6-pack” muscles, or more scientifically called the rectus abdominus. However, the core is made up of so many other muscles, and it is crucial that we strengthen all parts of the core in order to support a healthy spine and overall physical longevity. So what are the other muscles that make up the core, and what do I mean when we target the “deep core” muscles? The core is comprised of 35 different muscle groups that run along the spine and connect to the abdominal, pelvis, and hip areas. It would take much more than a brief write-up to cover all the muscle groups and which exercises will benefit which parts of the core, but generally speaking, core work should engage the rectus abdominus (your 6-pack muscles); the hip flexors and muscles that make up the pelvic floor, the obliques, as well as the muscles that support the lumbar spine (lower back). Targeting all of these different muscle groups, beyond the rectus abdominus, is what the term “deep core work” applies to; utilizing a diverse array of exercises to target the deep core will not only provide you with a stronger and more stable core, but may also help you to tone the abdominal region if that is your goal. Other benefits of cultivating a stronger and more stable core include: • Improved Posture • Potentially reduce back pain/tension • Potentially reduce discomfort in the hip/pelvic regions • Greater balance • Increased mobility I hope that this workout empowers you with a new lens and set of tools of how to work your core, and I hope this workout challenges you as well! Equipment • Yoga Mat • Yoga Blocks (optional) Flow Structure Integration • Table Top • Wrist Stretches • Core Awareness • Cat/Cow [x8] • Spinal Alignment [x3/side] Warming • Beast Plank • Cat/Cow [x4] • Spinal Alignment [x2/side | Modification: Drop the palm] ************************************** Water Break ************************************** Exploration • Down-Dog • Cheetah • Low Crescent Lunge • Elbow-Knee Twists [x3] • High Crescent Lunge • Warrior 3 • Spinal Alignment [x3] Peak • Chair Pose • Boat Pose Hold • Rows [x6/side] • Low Boat Hold ************************************** Water Break ************************************** Re-Center • Baby Cobra Lifts [x4] • Cobra Hold [Advanced Option: Boat Pose] Release • Supported Bridge • Banana Asana Rest • Your Savasana
Quick Cool Down Stretch Fitness Health Track
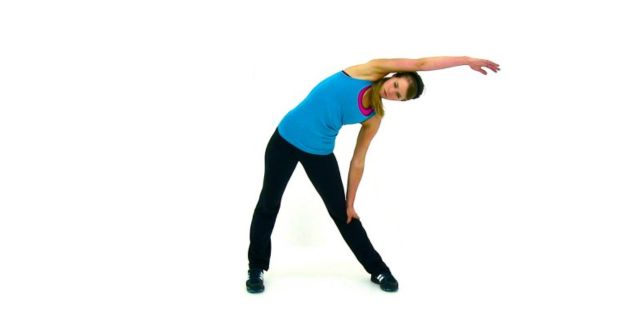
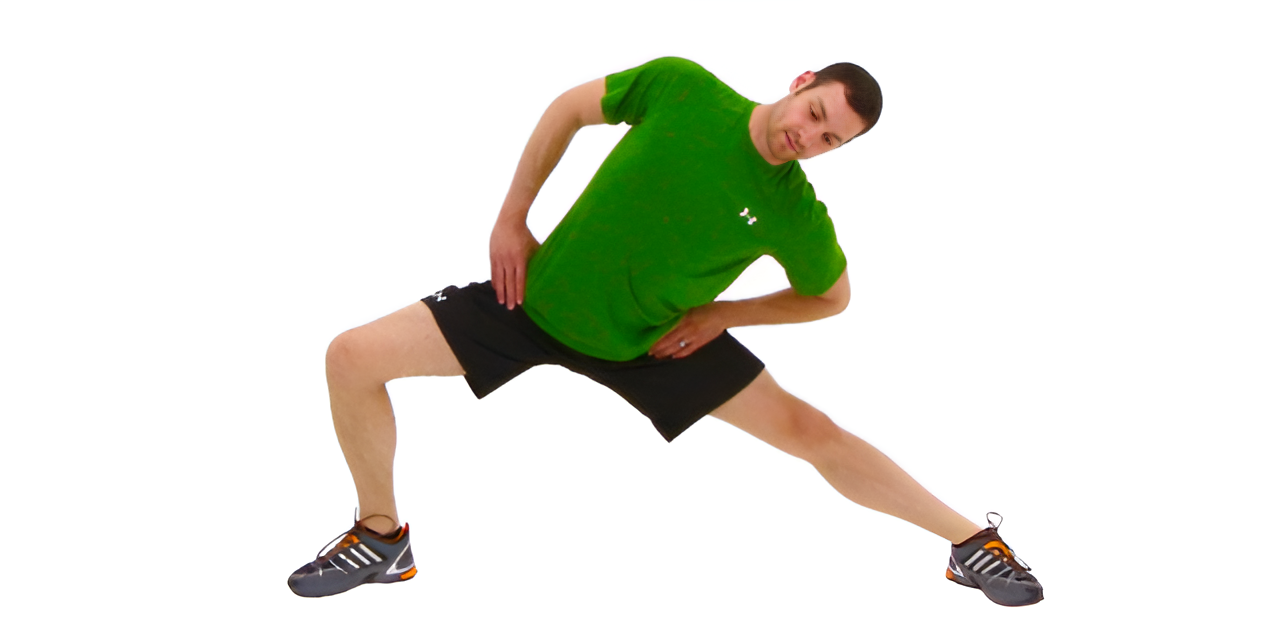
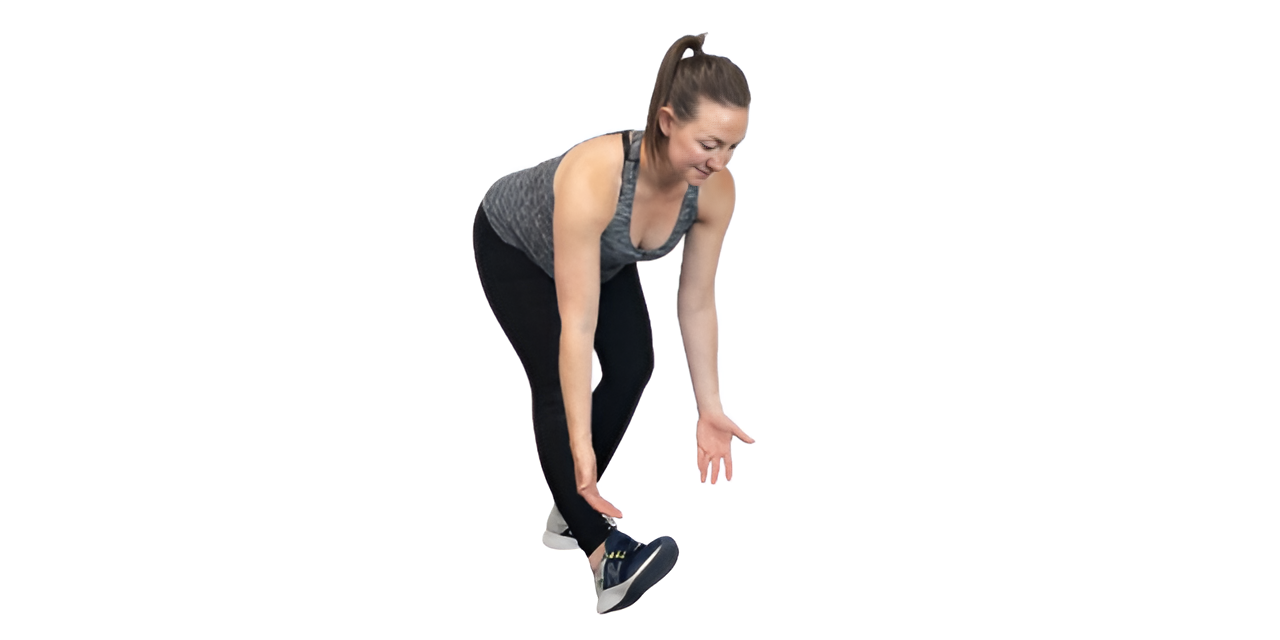
As you may already know, stretching is an integral part of any fitness routine and there are many different styles and ways to do it. Trying to decide which style to use and when can be very confusing. We have made one choice easy for you by creating a cool down stretch routine. This routine utilizes non-corrective stretches (a short duration hold that wont loosen your joints) to help release tight muscles and promote circulation to flush out waste products created while exercising. This routine is not to increase flexibility but instead to give you a way to bring down your heart rate and core temperature at a controlled pace to give the body time to filter out waste products that can increase the intensity and duration of soreness and stiffness. This routine is also intended to give just enough of a stretch that though it may not increase flexibility, it will help you maintain your current flexibility which often diminishes when muscle tissues are damaged as happens with strength training, HIIT, plyometric training, Kettlebell training, and so on. In the following section we have listed each exercise that is included in this routine, in order, and what part of your body that each move focuses on (i.e. where you should feel it). Stretches included in this routine: Chest Cross Arm Swing: When combined with side steps or walking in place, this is a great way to keep the heart rate elevated slightly so it can more effectively push waste products to the kidneys and liver while taxing your body only slightly as to not create any excessive waste itself. You will primarily feel this in your chest and the front of your shoulder when your arms are pulled back behind your ribcage and in the rear of your shoulder and upper back when your arms are crossed over in front of your ribcage. Just be sure to move slowly and alternate which arm is on top when your arms are in front of your body. Wide Toe Touch: With your feet wider than shoulder width you stretch a slightly different part of your lower back, hamstring (back of the thigh), glute (butt) and calf (only slightly) than you would when doing a regular toe touch (aka straight leg hang) with your feet together. Try modifying this by pointing your toes out or in to target different areas of your legs, back, and hips. Squatting Glute Stretch: Though this stretch requires a bit of extra balance and control to do without assistance, it is a great way to stretch deep into the glute (butt) muscles and also will hit parts of the lower back. Start with only a shallow squat then build up over time until you have the flexibility and strength to get to a full squat. Inside Thigh Stretch: This position gives you the same benefits of dropping down to do the side splits (or trying anyway) but without the uncomfortable feeling by focusing on only one leg at a time. With one leg bent you are able to focus on getting the stretch on the inside thigh/groin of the straight leg. To intensify the move, you don’t need to drop further into a side lunge, instead just focus on dropping your hip lower (on the side with the straight leg). Lunging Hip Flexor Stretch: The hip flexor (front of the hip joint) can be a hard location to stretch properly but this position does a really good job of isolating the hip flexor one side at a time. The key with this position is to keep the back leg straight (this is the side of the body where you will feel it). To intensify the pull, lunge lower and/or lean back slightly. Just be careful to move to the identical position on the opposite side. Standing Quad Stretch: This is another position that can be a bit challenging for balance without any assistance but it is a great way to target the quadriceps (the front/top of the thigh). Only pull your heel as close to your butt as you can without your knee feeling uncomfortable; don’t pull too hard as it can over compress and damage/loosen your knee joint. Once you have a slight stretch, pull your knee back behind you (using the muscles in your leg) to intensify the feeling in the hip and quadriceps. Side Bends: This motion targets the obliques as you lean sideways. It can be modified to incorporate the outer thigh as well by bringing your foot across in front of you at the same time. For example if you are leaning to the left then pull your right leg (the same side you will feel it in) across to the left as well. This should intensify the pull on the right oblique as well as adding a pull to the right outside thigh and hip. Arm Cross Shoulder Stretch: This motion targets the rear of the deltoid (shoulder) and the rhomboid (upper back, over the shoulder blade). Depending on the flexibility of these areas you may not feel much of a pull, but keeping your upper arm close to your chest and pulling with the opposite arm across and away from the shoulder to be stretched should intensify this motion. Overhead Tricep Stretch: Targeting the tricep (back of the upper arm) can be difficult but this position does a good job of not only targeting the tricep but also various parts of the shoulder complex (muscles that surround the shoulder socket). Be sure to reach back to the same shoulder as arm you are stretching to get the most tricep pull. Wall Shoulder Stretch: Shoulder range of motion is often an issue that can limit ones ability to perform various upper body exercises properly. This position is a great way to keep from losing that range of motion and when held for longer time periods it can help you to regain lost range of motion, allowing you more freedom of movement with the arm fully extended overhead. Just be sure to keep a flat back rather than letting it arch as this can cause back pain/injuries if hyperextended.
Lower Back Stretching Routine Fitness Health Track
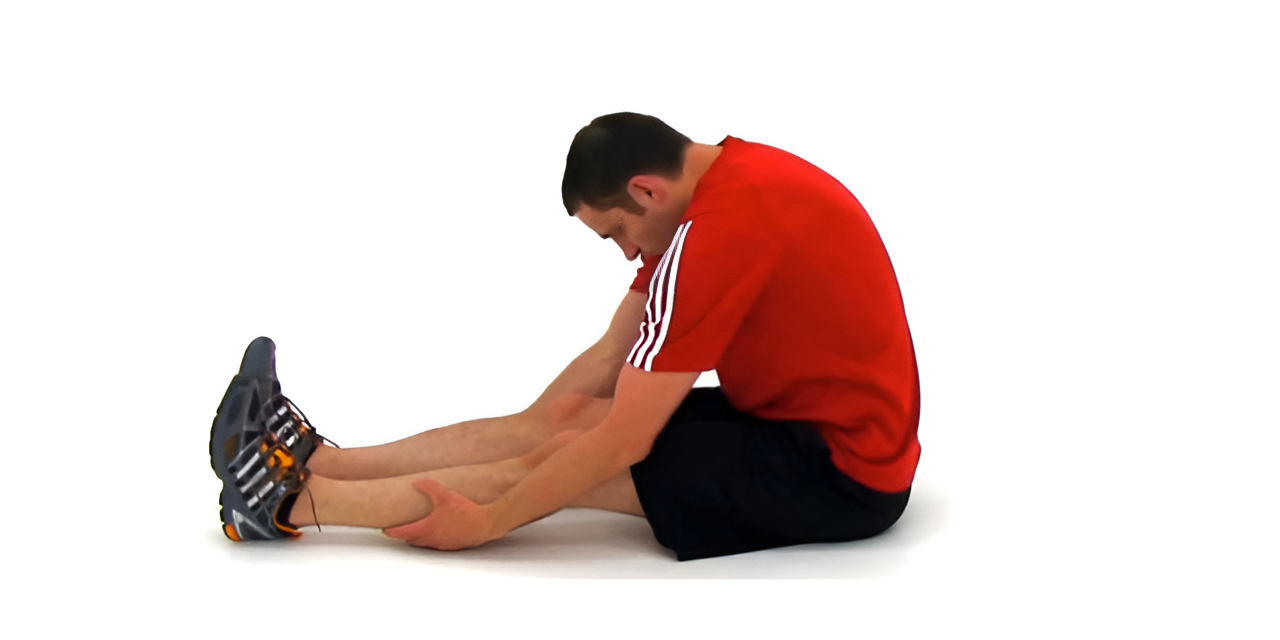
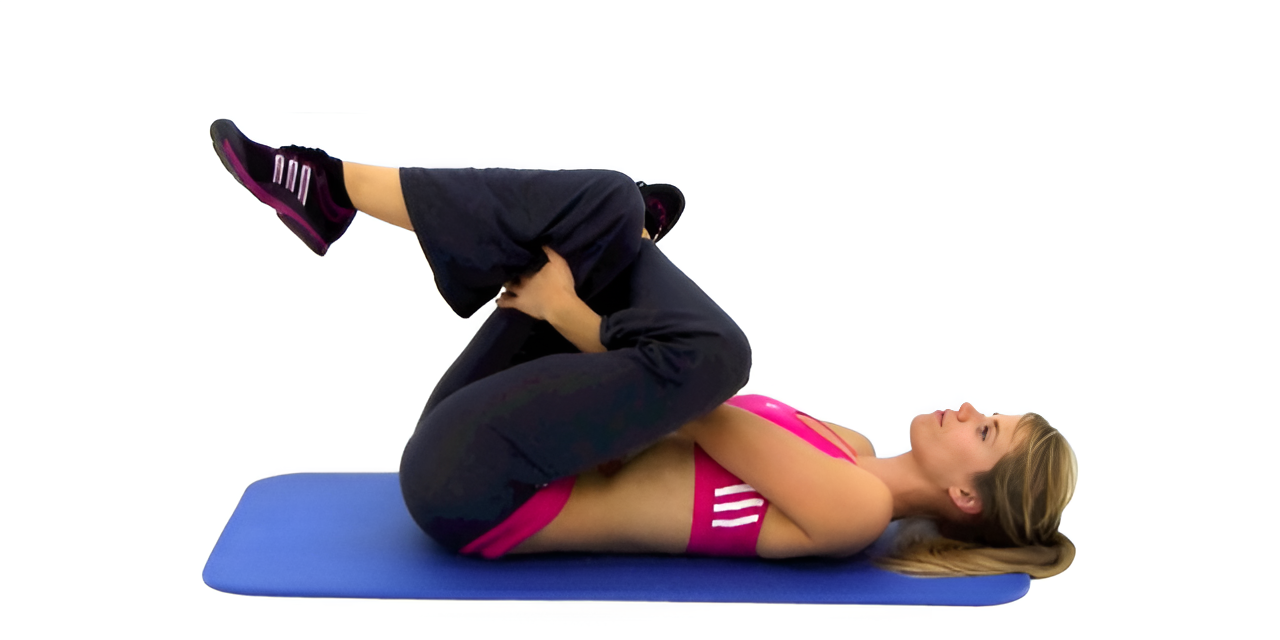
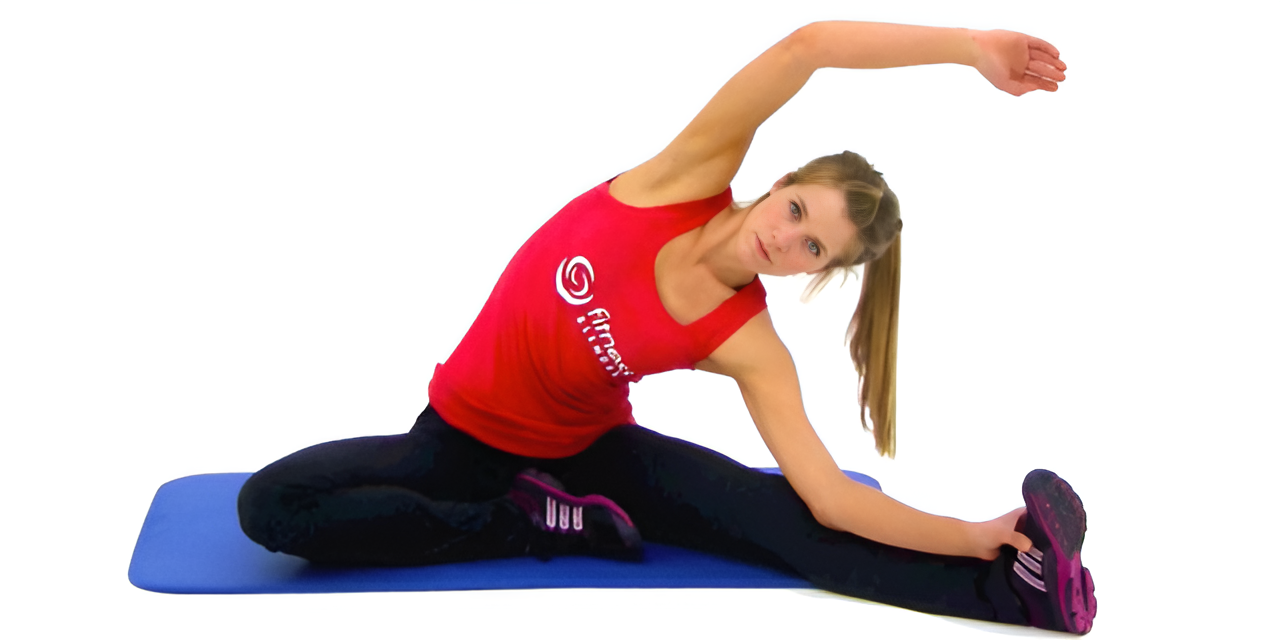
Years of sports related injuries, everyday life, and just plain inactivity can slowly cause you to tighten up and lose range of motion all over your body. One of the most common areas of the body for this to happen is the lower back/trunk area. This decrease in mobility around the torso can happen suddenly after an acute injury to the lower back or it can happen very gradually from small repeated micro injuries. Either way the result is the same; scar tissue builds up in muscle tissue, ligaments and tendons cause those tissues movements to be restricted which in turn leads to an overall restriction in the body’s ability to move. The longer this limitation persists, the more likely it is that new injuries occur causing an even further restriction of movement. That is where these stretches come in. This is a basic set of stretches focused on the most common areas of movement restriction with the specific intention of diminishing the scar tissue that causes the limited range of motion. Each stretch is intended to be held for 30 seconds, however if you are particularly tight you may want to hold the position for up to a full minute to see results more quickly. When starting this routine you will want to do it 2-3 times per day, everyday for a week or until you feel as though you have gained the flexibility that you want. Once you have reached your desired flexibility do this routine two to three times per week to make sure you maintain your flexibility; it is a great companion to any core (abs, back, obliques) exercise routine. If you are currently suffering from a back injury this routine may be able to help you recover more quickly but as always you should always ask you doctor or health care provider about whether or not it is appropriate for you and your specific injury or condition. The following is a description of each stretch and roughly where you should be feeling it (various people will feel the same stretch in slightly different areas, specific to there own individual body’s past injuries). Stretches: Seated Toe Touch: Probably almost everyone has done this stretch at some point in their lives. You simply sit on the floor, extend your legs out straight in front of you and without bending your knees, reach down to your feet as far as you can. You should primarily feel this stretch in the back of your leg and knee, as well as your butt, lower back and possibly your calves. You can intensify this stretch by flexing your toes back towards your shins. Deep Glute Stretch: This is a great stretch for those suffering from sciatica. Pull your right leg up so that it is resting on your left knee/thigh then pull your left thigh in towards you being sure to only grab your thigh and not your shin. You should feel this stretch in your right leg deep into your butt and hip area as well as in your lower back area; you may also feel it along the side/back of your thigh. When you switch sides you will feel it on the opposite leg. Prone Torso Twist: This motion is intended to increase your rotational range of motion; basically increasing your ability to rotate around your torso. Lie on your back and lay both legs off to one side so that your thighs are perpendicular to your torso and your knees are stacked. Be sure you keep your shoulders flat against the ground and turn your head in the opposite direction that you lay your legs. You should feel this all around your torso and possibly up into your rib cage. You may also feel this in the outside thigh of the top leg. Cobra Stretch: This is based off of a yoga stretch that focuses on tight abdominal muscles as to reduce the tension that those muscles put on your back. Lay face down on the ground and place your hands back by the base of your rib cage. Slowly press into your hands arching your chest up and back as well as tilting your chin up towards the ceiling. You should feel this throughout your stomach area, the front of your hips and possibly the front of your thighs. You may also have a stretching feeling in your lower back. Just be sure not to push this stretch too far or move into it too quickly. Shell Stretch: This stretch is used in both yoga and Pilates to target the upper and lower back. Sit back on your heels and place your hands just outside your knees. Round forward pulling your shoulders to your hips at the same time as pushing your shoulders back towards your hips by pushing your palms down on the ground and forward away from you – don’t let your hands actually move. You will feel this stretch in your lower back from the top of your hips to the base of your rib cage and slightly less intensely in your upper back from the base of your rib cage up through your neck.
Cool Down and Full Body Stretch Fitness Health Track
Bring your heart rate down at an ideal pace and stretch your entire body thoroughly with this Cool Down & Total Body Stretch video. When you bring your heart rate down slowly, you allow your body to continually flush out all of the waste products that you built up over the course of your more strenuous workout routine. Your heart gets to slow down at a gradual pace instead of coming to a sudden stop. Cool Down: 30 Seconds of Each Jumping Jacks Jogging in Place Standing Toe Touches Side Lunges Walking Arm Stretches 10 Minutes of Total Body Stretching Standing Stretches – 15 Seconds Each • Straight Leg Hang – Lock out your knees and reach for your toes. You will feel this in your hamstrings. • Overhead Triceps Pull – Raise your arm above your head, bend at the elbow and use the opposite hand to pull it across your shoulders. • Standing Quadriceps – Bend one leg at the knee and hold the heel of the foot against your butt. You will feel this in your quads (the front of your thighs). • Wall Chest Stretch – Place one hand on a wall with your fingers pointed behind you. Rotate your body away from the wall until you feel it through the front of your chest. • Inside Thigh Stretch – With feet spread wide apart, lean backward until you feel it through the inside of the thigh you are leaning away from. • Wall Shoulder Stretch – Press both hands up against a wall at about head height. Press your chest & head down towards the floor until you feel it through the front of your shoulders. Seated Stretches – 15 Seconds Each • Prone Calf Stretch – Get into a push up position and put your weight into just one leg to get a good release through the calf of that supporting leg. • Arm Cross Pull – Pull one arm across your body, using the other hand to pull the elbow for more range of movement. You will feel this in the back of your shoulder and your deltoids. • Butterfly – Bring the soles of your feet together, bring them in towards your body and lay your legs down toward the ground. • Three Way Hamstring – There are three different leg positions that you will use; to the outside, straight out, and angled inside, to thoroughly target the thighs and hamstrings. Repeat on both sides of the body. • Supine Torso Twist – Lie flat on your back and rotate on the torso to lie both legs on either side of the body. • Deep Glute Stretch – Lie on your back, bend one leg & place it across the other thigh, and then pull that straightened leg inwards in order to feel it through the leg that is crossed. This is a great exercise for back pain and avoiding sciatica. • Cobra – Lie on your stomach and use your hands to press your upper body and core up and off of the mat. You will feel this through the front of your body. • Shell Stretch – From the Cobra, press back so that you are on all fours. Round your back and shoulders and press your hands into the floor in order to press your shoulders down towards your hips. You will feel this one in the lower back, rhomboids and trapezius. 12 Minutes may feel like a lot of time to spend cooling down and stretching, but it’s very important to realize how important flexibility is to the overall picture of health and fitness. Strength, endurance, flexibility, weight loss, and overall health will suffer without proper attention to maintaining dexterity & elasticity of the muscles. In other words the twelve minutes you spend doing this routine after a workout is very much time well spent.
Lower Back Stretches for Sciatica Pain Fitness Health Track
Sciatica, also know as Piriformis Syndrome, can be down right miserable and can be, quite literally, a pain in the butt (and leg, and back). The pain can range anywhere from a minor annoyance to a debilitating ache targeting various areas in your legs, hips, butt, and lower back. No matter where it chooses to rear its ugly head, sciatica can be treated quite effectively with some simple low back stretches. As always, but especially with injuries and conditions like this, talk to your doctor or a physical therapist before you start any kind of exercise program – even stretching. This stretching video includes 8 moves that focus on all of the main areas in which sciatica pain can arise, helping to release the built up tension. It leads you through each exercise for the recommended holding time and gives verbal queues on form. When done regularly this stretching routine for the lumbar and legs can also help prevent further Piriformis Syndrome flair ups from arising in the future. When using this video to help recover from a current bout of sciatica, use a rotation of ice and heat before stretching. Alternate between a heating pad and an ice pack on your low lumbar region and upper hips for 30-45 minutes leaving each on for 5-10 minutes. Make sure you end your cycle with heat, then start the video while your back is still warm. It takes a bit of extra time but can drastically reduce your recovery period. Tips: You can always hold these positions for a longer time period to get more benefit. Repeat this routine multiple times a day if needed. Never push for more range of movement than is comfortable; it should never be painful. Stretching for long periods of time can loosen joints and temporarily increase your chances for injury during physical activity (do not stretch before a workout).
Lower Body Stretches A Stretching Routine for Flexibility Fitness Health Track
Fitness Health Track’s lower body stretching routine is the perfect way to wrap up any kind of strength training or cardio routine. You can do this as often as you like, virtually any time, however, we recommend that you not do this workout immediately before starting straight into a vigorous exercise regime. Because the stretch positions are held for roughly 30 seconds apiece, this routine is more ideal for after a workout is complete; holding a position for this long before strenuous physical activity can be potentially dangerous because it can actually loosen your joints, raising the odds for preventable injuries and strains. Flexibility is one of the biggest indicators of quality of life as you age. Using lower body stretches like the one in this video will help you maintain or improve your flexibility and range of motion. In fact, the amount of elasticity of your muscles can even be an indicator of seemingly unrelated variables, such as the elasticity of your arteries. In recent studies, people who are capable of higher ranges of motion have been shown to also have less rigid arteries, which makes for a lower blood pressure and reduced chances of heart disease and illness. Dr Kenta Yamamoto of the University of North Texas, was part of a study published in the American Journal of Physiology – Heart and Circulatory Physiology, where it was found that those who had reduced flexibility of the trunk, as demonstrated by a simple toe touch stretch (as seen in the video above), had a higher systolic blood pressure than people who were more limber and had full range of movement. A habitual stretching component should be of upmost importance, right up there with cardiovascular training and strength training. This is both for reasons of staying mobile and agile, and for improving overall health. With that said, flexibility is not something that you should wait to work on until you are older. Maintaining your body’s full range of motion is something that you have to be proactive about protecting from time and the wear and tear that everyday activity has on your body – that is in reference from everything to running a few miles on the treadmill, or sitting all day at your desk (in a less-than-accommodating chair) staring into a computer screen. Printable Lower Body Stretching Routine Toe Touch Stretch Inside Thigh Stretch Standing Quadriceps Stretch Deep Glute Stretch Butterfly Stretch Seated Hamstring + Oblique Stretch Single Leg Hamstring Stretch Seated Crossover Hamstring Stretch Standing Wall Calf Stretch If you don’t like straightforward stretching routines, you can exchange it with Pilates or yoga and get a similar benefit. If you were to do this video diligently once a day, you would be able to see a difference in your flexibility in as little as two weeks.
Restorative Bodyweight Workout Fitness Health Track
Is today a day you want to get moving but have a case of delayed onset muscle soreness (DOMS)? Or maybe you’re simply in the mood for some low-key and feel-good movement? This routine is the perfect way to accomplish either of those goals. For this workout, I was on a mission to create something that would be a nice treat to your body after a hard workout, or if you’re feeling stiff in general. One of the best ways to ease sore muscles is to move. Nothing strenuous, just simple movement to get your blood circulating. DOMS typically shows up 24-72 hours after a really tough workout, so it’s ideal to plan a recovery workout (like this) somewhere in that window. Don’t try to “muscle through” the pain of muscle soreness. It’s okay — in fact, it can be extremely beneficial — to take a step back. We’ll be pairing a gentle movement series to get the blood flowing with a lengthy deep stretch to loosen everything up. To start, we’ll run through a series of 12 exercises for 50 seconds on, 10 seconds off. These are not meant to be done fast or intense. The goal here is to simply move your body, mobilize your joints, and circulate blood flow in your body. For the second half of the routine, we’ll move through a lengthy, 10-minute stretch series with long holds of 50 seconds each. Take your time with these and focus on breathing into and releasing areas of tension that you have. Also, feel free to freestyle and add in your own stretches that sound great! No warm-up or cool-down is included or needed. Simply press play, dive in, and enjoy this little treat for your body. Thanks for moving with me today! Nicole Printable Workout Gentle Movement Series (12:00): 1 round, 50 seconds on, 10 seconds off March in Place Cross Reaches Overhead Reach to Stepback, alternating Hamstring Scoops Good Morning + Torso Rotation Curtsy Step + Overhead Reach Side Shifting Lunges Toe Reach to Squat Windmill Squat Walk to Single Leg Balance Child’s Pose to Down Dog Thread the Needle, alternating Stretch Series (10:00): 12 stretches; 50 seconds each Inhale to Wide-Legged Forward Fold Wide-Legged Hamstring Stretch, R/L Half Kneeling Hip Stretch – R Single Leg Hamstring Stretch – R Pigeon – R Half Kneeling Hip Stretch – L Single Leg Hamstring Stretch – L Pigeon – L Tall Kneeling Overhead Reaches, alternating Chest Opener Down Dog w/ Foot Pedal Child’s Pose – R, L, C

Upper Body Stretching Routine Fitness Health Track
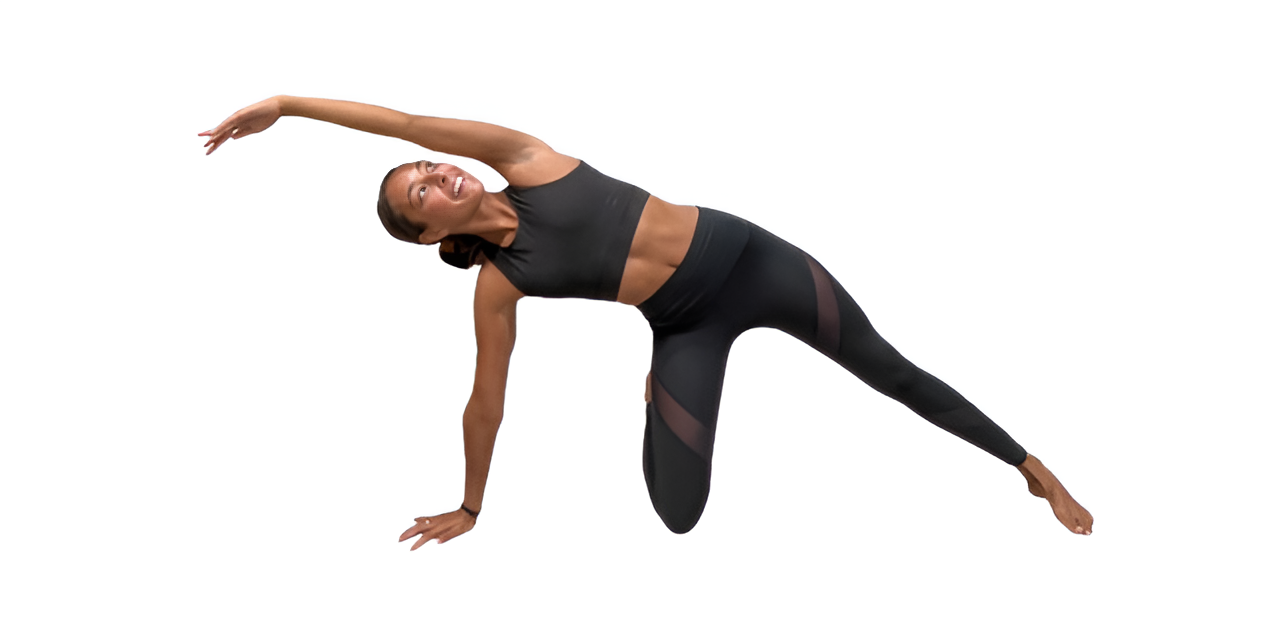
Maintaining muscle elasticity and flexibility is a major indicator of quality of life as you age. It’s not just for the elderly, though; it is imperative for those who enjoy active lives to take a proactive approach in working to preserve their flexibility in order to be able to keep doing the physical activities that they enjoy the most. Having a inflexible neck or stiff upper body can cause mobility issues, headaches, dizziness, and many other uncomfortable physical issues. These upper body and neck stretches are ideal for everyone between the ages of 5 and 135. They work well for people just getting back onto the fitness scene, and they would provide just as much benefit to gym veterans. These moves also accommodate individuals of all sorts; from runners to heavy lifters, couch potatoes to competitive athletes. There are eight different upper body and neck stretches in this 11 minute video. You can do this stretching routine as a stand alone activity or you can do it after you complete a workout. If you have been feeling particularly tight or struggling with a stiff neck or upper body, you can easily follow along with this video 2-3 times a day until you start feeling better. While you do these gentle stretches, don’t be surprised if you start to hear things pop as your alignment finds it’s way back to it’s proper place. When it comes to stretching, whether you have any existing discomfort or not, you should never, ever use force to complete a movement. Use slow, controlled motions and never use jerking or bouncing motions in order to squeeze any extra range of motion out of any given movement. Here’s a bit about each of the exercises in this flexibility routine: 3 Point Neck Stretch – This progressive neck exercise is fantastic for loosening up sore muscles and helping ward off heachaches and muscle spasms. Listen to the verbal cues of the stretching video in order to know when to change positions. Overhead Tricep and Shoulder Stretch – You will feel this in shoulder joint, and in the back of your arm (tricep muscle), from the shoulder joint to the elbow. Forearm and Finger Stretch – This is effective for tension throughout the palm of your hand and your forearm. Move your fingers and thumb throughout the hold in order to vary the specific muscles being engaged. Overhead Chest & Lat Stretch – With the help of a wall, this is excellent for the muscles around the chest, shoulder socket, and ribcage. Standing Chest against Wall – You will feel this across your chest, in your forearms, and within your bicep muscles. This one feels great as it opens up your chest very thoroughly and helps relieve any tension that you feel you might be carrying across your shoulders. Arm Cross Rhomboid Stretch – This one helps increase or maintain shoulder mobility. You will feel this move primarily in the upper back and in the rear deltoids. Torso Rotation – Years of sedentary habits or sitting at a desk eat away at the flexibility of your midsection, causing a slew of related health problems and physical limitations. This move can help improve your torso flexibility. Lateral Bends with Reach – You will feel this move from the top of your hip, up the sides of your body as far up to your armpit. You should always talk to your doctor before jumping into any exercise or workout program, especially if you have any existing pain or injuries to work around. With that said, and with doctor approval, this upper body stretching routine can help you gain back flexibility and help lessen the likelihood of any future discomfort.
Fitness Blender 5-Day Challenge Day 6: Yang/Yin Yoga Flow: Active Recovery for Mindful Strength-Building Fitness Health Track
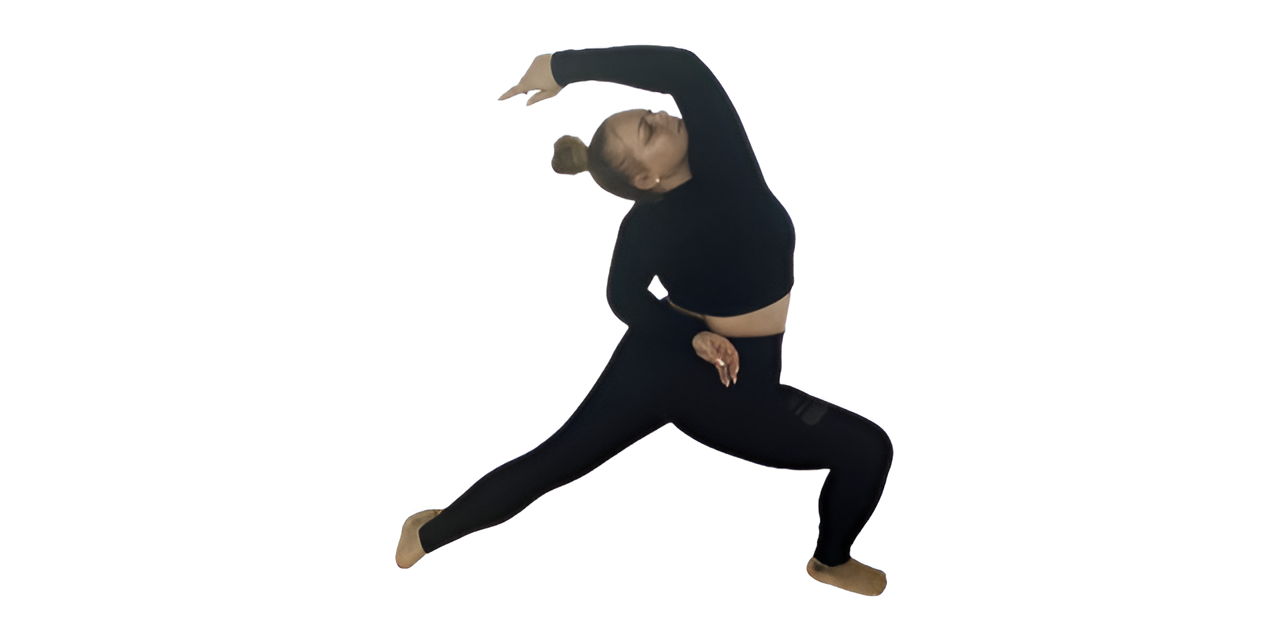
Join me on the mat for a delicious, total-body rinse and release, beginning with a warming Vinyasa yoga flow, and ending with a grounding, Yin-inspired stretch session. This workout is part of our Free 5-Day Workout Challenge, but can be done as a standalone workout. If you’re here as part of the challenge: welcome to bonus Day 6 and way to go for prioritizing your active recovery! Now, let’s discuss the workout: This practice contains a warm-up, workout, and cool-down. The warm-up and workout take place in the first half of the practice, where we will warm and engage our muscles. The low-impact movements and posture holds will help us to increase not just muscular strength, but joint strength as well, and actively increase our mobility (range of motion pertaining to joints). If anything offered in this section of the practice feels inaccessible, please take the modification offered (while I do mention some modifications throughout the video, please read below to see more options) or skip the posture altogether. As always, everything I call is a suggestion; this practice is yours and I always encourage my students to get creative and honor their bodies with movements that feel good for them. After our water break, we will melt into our mats with some Yin-inspired stretches. This second half of the practice is considered Yin-inspired because — while you might find some of the stretches offered in this practice in a typical Yin class — we are not holding the postures for nearly as long. Furthermore, a Yin practice has longer holds of these poses so that the body can release with the help of gravity over time, and these longer periods of stillness allow the stretch to passively open joints and release tense fascia tissue. We will not be diving as deep as a true Yin class, however, these stretches can help release any tension in tight muscles, and help you to find an even deeper range of motion in your joints. As always, if you would like to hold any of these stretches for longer, or you would like to add on to your Yin-inspired practice, feel free to pause the video and make this practice your own. There are so many benefits to taking an active recovery day, including (but certainly not limited to) a decrease in lactic acid build-up/soreness, expedited muscle recovery/rebuilding, and improved circulation and waste removal. While this practice can serve as a form of active recovery, you can always come back to this flow any time you’re looking to move a little more gently — not just on your active recovery days 🙂 I hope this practice leaves you feeling more open and at-home in your body! If you enjoyed this 5-Day Challenge, check out the new 4-Week FB Strong Round 3 program, which follows the same theme of workouts. In the program, you’ll find a unique Plus workout every single day (no repeats!). Workout Notes + Benefits: • You can modify your spinal alignment (aka ‘Bird-dog’) by keeping both hands on the mat, and hugging low belly to spine as you expand and contract through the one lifted leg. • You can modify all planks, Vinyasas, and lunges by taking these movements from the knees. • Always work with your range of movement. There is no need to force your body into shapes or positions that cause pain or extreme discomfort. Even if you can’t Warrior 2 with your leg parallel to the mat, or sit all the way into your squat, go as low as your body will allow and work from there; I promise that you are still receiving the benefits of the poses and you are gently (and actively) increasing your range of motion. • Remain mindful of your upper-body posture. Work to keep the chest and gaze lifted in our active lunges and squats. As the body tires, it may be tempting to round the upper back, letting the chest collapse forward. Keeping the gaze lifted and the core tight can help you to keep the chest lifted. • If the wrists ever pose an issue, you can take fists to the mat or bring blocks (firm, weighty books work as well) underneath the palms for added support. • If Crow is in your practice, feel free to take the arm balance through a Vinyasa when we’re transitioning from the Active Yogi Squat. You never need permission to ramp things up or get upside down 😉 • Make sure to actively breathe with our movements and static posture holds. Actively breathing will not only help to warm your muscles, but it can help you release tension held in the muscles; clenching your jaw and/or holding the breath can actually increase the amount of tension being held in the body. Active breathing is especially important in the Yin-inspired section of our practice, as it is much easier to forget about the breath when we’re moving less, and the resistance you feel to the stretches makes you want to tighten up further. • Warming and engaging the muscles through low-impact, strength-building movements can help to increase circulation, aiding in muscle recovery. Furthermore, when we actively stretch our muscles before passively stretching them, we decrease our risk of injury to those muscles and increase our mobility. Equipment • Yoga Mat (optional) Flow Structure Integration • Reverse Plank Flow [x3] • Boat • Low Boat • Down-Dog Flow [x3] • Knee Tap • High Plank • Optional Chaturangas [0-3] • Walk Hands Back to Forward Fold • 3 Half Sun A’s Warming • Table Top • Spinal Alignment [x3] • Modified Side Plank • Cheetah • Wild Thing Exploration • Runner’s Lunge • Modified Pyramid • Active Squat • Modified Crow • Oscillating Cobra • Locust • Vinyasa Peak • One-Legged Mountain • Half Moon • Warrior 2 • Active Skandasana [Modification: Archer’s Pose] • Prasarita w/ Fold • Twisted Lizard Lunge • Vinyasa Water Break Re-Center • Half Pigeon [Modification: Reclined Half Pigeon] • Half Lord Of The Fishes • Snail Pose • Puppy • Sphinx/Seal Release • Shoulder Stretch • Half Frog [Option: Thread The Needle] • Child’s Pose (as a transition onto back) • Banana • Happy Baby or Plow [Advanced Option: Shoulder Stand or Yogi Choice Inversion] Rest • Your Savasana
Total Body Morning Yoga Fitness Health Track
This flow is one of my favorites. When I wake up in the morning, I like to start my day with routine stretches that will get my blood flowing, my energy up, and set the tone for the day. This practice will make you sweat and help your body decompress at the same time. Patterns of movement create a sensory memory that we can build on. Starting with the pattern of breath, each movement is meant to match each inhale or exhale to encourage deep controlled breathing that promotes decreased feelings of stress, increase energy level and relaxation, and stabilize blood pressure. If you focus on your breath, your mind will calm down. Below are some alignment cues to keep in mind for safety in Low Lunge: Start in a runner’s lunge, right leg forward with knee over ankle and left knee on ground with top of your foot flat on the mat. Slowly lift torso and rest hands lightly on right thigh. Lean hips forward slightly, keeping right knee behind toes, and feel the stretch in the left hip flexor. Hold here, or for a deeper stretch, raise arms overhead, biceps by ears. Hold for at least 30 seconds, then repeat on opposite side. The low body muscles targeted in this sequence include the hamstrings, hip flexors, quads, and glutes. Each time we cycle through a pattern of movement, there will be 1-2 postures added to the sequence. Repetition with all the body to open up to each shape gradually. Meet me on the mat! Warm-up Seated Side Stretches Table Cat / Cow Down dog Three legged dog LEFT SIDE Fold Upward salute Fold Half lift Plank Chaturanga Upward dog Down Dog Repeat on the right side Tiptoe to Top of the mat Fold Power Pose hands bound Chair pose Fold Upward salute Fold Plank Chaturanga Upward dog Down Dog ***Break*** FLOW Three legged dog LEFT SIDE Low Lunge High Lunge Warrior 1 Warrior 2 Reverse Warrior Side angle DYNAMIC MOVEMENT Fold Upward salute Fold Half lift Plank Chaturanga Upward dog Down Dog Repeat on right side Three legged dog LEFT SIDE High Lunge Warrior 1 Warrior 2 Reverse Warrior Side angle Triangle Reverse Triangle Fold Upward salute Fold Half lift Plank Chaturanga Upward dog Down Dog Repeat on right side ***Break*** FLOW PHASE 2 Three legged dog LEFT SIDE Knee to nose Knee to elbow Knee to opposite elbow Pigeon pose Three legged dog LEFT SIDE Plank Chaturanga Upward dog Down Dog Repeat on right side COOL DOWN Walk hands back to feet Squat Take a seat Staff pose Boat pose Happy baby Your Resting Pose
Active Upper Body Stretch Workout PNF Stretch Routine for the Upper Body Fitness Health Track
A long day in front of the computer, the aftermath of a particularly brutal upper body strength workout, or too many hours spent becoming one with the couch as you binge watch your favorite streaming shows; no matter what the reason, sometimes you could really use a long upper body stretch to loosen up those tight joints and muscles and get you back to normal. Well, if that is what you need, then this upper body stretch routine will be the perfect workout for you. There are two different ways you can go through this routine depending on how much effort you feel like putting in. Option one is to do an active stretch by following along with the video exactly as it is demonstrated, which includes using your own musculature to pull yourself into each stretch. This has a number of benefits, which I will cover below. Option two is to do a passive stretch by removing the contracting of your own muscles to pull into each stretch. Instead, using gravity, a static object, or another limb to pull yourself into each stretch allows for a much more relaxing form of this routine. Just keep in mind that you will have to modify the stretches slightly from their original form to do them passively. You can always mix it up per stretch as well, and do a combination of both styles. If you do decide to tackle the active version, this will be a very different experience (especially if you have never tried active stretching before). This actually is a form of PNF (proprioceptive neuromuscular facilitation) stretching, which uses your own body’s natural mechanisms to help facilitate a deeper and more productive stretch. Simply put, by contracting the opposite muscle you are trying to stretch, it causes the stretched muscle to more fully relax, allowing it to lengthen more than it would with a passive stretch. But getting a deeper stretch is not the only benefit to this style of stretching. Active stretching can also help to facilitate muscle tone, and control over the increased range of motion that you are developing, as well as more readily expose any imbalances in flexibility or strength from left side to right side and front to back. This style of stretching also burns calories as you have to engage multiple muscles for long durations through this routine. Let me know what you think in the comment section below. Loved this routine and wished there was one for the lower body as well? We have you covered with our Lower Body Active Stretch Routine – PNF Stretch Routine for the Lower Body. Feel free to add them together for a super-effective total body stretch or split them up over the day or week. Printable Workout – Overhead Reach + Side Bend – Other Side – Round to Open Chest – Arm Cross Stretch – Other Side – Chest Opener (90*) – Chest Opener (Down 45*) – Chest Opener (Up 180 *) – Overhead Tricep + Lean – Other Side – Rotator Cuff (Elbows to side, Open) – Rotator Cuff (Elbows to side, Closed) – Rotator Cuff (Elbows up in straight line, Open) – Rotator Cuff (Elbows up in straight line, Closed) – Rotator Cuff (Elbow straight in front of shoulder joint, Open) – Rotator Cuff (Elbow straight in front of shoulder joint, Closed) — Break — – Wrist Stretch Up – Wrist Stretch Down – Neck Side Stretch – Neck Side Stretch Chin Down – Neck Side Stretch Chin Up – Repeat this sequence on opposite side – Neck Front Stretch Chin Up – Neck Back Stretch Chin Down – Arm Cross + Rotation – Arm Cross + Rotation

Upper Body Active Stretch Workout Arms, Shoulder, Chest, and Back Stretching Exercises Fitness Health Track
When you need to do a flexibility routine, whether you just finished a workout or you are wanting to do some corrective stretching on your day off, you have a choice between two different styles. These two different styles are Active Stretching and Passive Stretching. The difference between the two is actually quite large considering they both are intended to do the same thing; increase flexibility. Though we use the active form in this video lets cover the passive version first. Passive stretching is primarily using gravity or some other passive form like a machine to lengthen your muscles, ligaments, and tendons; think a Straight Leg Hang also known as a Standing Toe Touch. A Standing Toe Touch uses gravity to pull your upper body down towards the floor (when not engaging any other muscles) and is only as effective as the amount of leverage your upper body can place on your hamstrings (the back of the thighs). When done on a regular basis your body will increase its flexibility around the hip joint lengthening the muscles and tendons in the back of the thigh but it does nothing when it comes to control of that new range of motion. Active Stretching on the other hand specifically engages the muscles that oppose the area you are wanting to increase flexibility in. What this does is allow your body to increase flexibility and strength simultaneously in regards to a joint’s range of motion. This means that no matter how flexible you become you will alway have control over that range, lowering your chances of putting your body in a dangerous position. An example of active stretching similar to the example I gave above would be a Seated Toe Touch where you are engaging your hip flexors (the muscles in the front of the hip) and the quadriceps (the muscles in the front of the thigh) to keep your leg straight while tilting your hips forward towards your legs to lengthen and tighten the hamstring (back of the thigh) and glutes (butt muscles). Not only does this form of flexibility training protect your joints more than passive stretching it also burns more calories. Because you are using your own muscle tissue to get into position, you have to constantly contract specific areas of your body for the entire duration of the stretch to keep the proper amount of tension. Because you are generally using only a few muscles at a time this ends up not being a huge calorie burner but it is still far better than the alternative and besides who is going to say no to a few more calories burnt throughout your day? Stretches in this Routine Overhead Tricep and Shoulder Stretch Arm Cross Chest Stretch Rear Arm Raise (Down and Up) Forearm Flexion and Contraction Abdominal Bow Lower Back Round Oblique Lean (Left and Right) Though this workout is not intended to be a big calorie burner it does happen to burn some calories. Depending on how hard you contract for each hold/stretch you can burn from 1 calorie per minute on the low end, up to 4 calories per minute on the high end. This will give you a range from 12 to 49 calories for this quick 14 minute stretching routine. Though it may not seem like much, every little bit counts when it comes to losing weight or keeping it off.